
Tutorial: How to receive Bitcoin donations on your Street Art pieces [ENG]
- 13 oct. 2019
- 7 min de lecture

For 2 years, I've receive more than $12500 (1.20 bitcoin) on the QR codes affixed to my frescoes. These donations, which are like a form of crowdfunding, have brought me a lot in my creative process. It helped me finance my projects: buy some much needed equipment and subsequently gave me a breath of freedom for my creations. After 2 years of experimentation, I feel like it is important to share this experience. It can help many fellow-artists with an additional source of income but also help them create ever stronger links with those who support their work. In particular, it gives an opportunity for people to financially help the artists whose ephemeral urban works they appreciate. With the success of the QR codes on my murals, I received many requests about the method I use. A tutorial seems to be the best way to convey this knowledge. I would really love to see a movement of street artists around the world using QR codes to receive cryptocurrency donations.
This tutorial explains in 3 steps how to receive Bitcoin donations on your street art works:
Step 1 - Create a Bitcoin wallet
First, it is necessary to create your wallet, which will generate your receiving address (this is the equivalent of a Bank Identity Statement that belongs to you). With this receiving address, you'll be able to receive Bitcoins in your wallet. The Coinomi wallet is one of the easiest to use, available on Android, iOS, Windows, MacOS and Linux. You are free to use any other wallet (Samouraï Wallet, Spot, Electrum ...). Make sure it's recognized and trusted.
Do your own research because hacks, phishing and scams are commonplace in the world of cryptocurrencies. Download the application.

Once installed, click on "Create new wallet".

The wallet will generate your recovery phrase (or "Seed", which is the private key of your wallet) which is most often a suite of 24 words.

Write down your recovery phrase by hand on a sheet of paper and keep it in a safe place (be careful to keep it private, anyone who owns this sentence becomes the owner of your funds).

Confirm on your wallet that you have correctly noted the recovery phrase and choose a password.
2nd step - Create the QR code visual
In your wallet, you need to generate a QR code with the receiving address.
Go to "Bitcoin BTC" in the wallet.
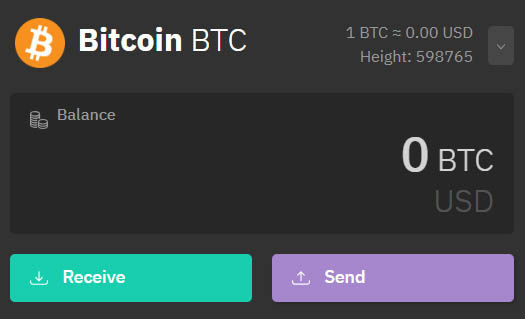
Click "Receive" (if indicated, choose a reception address "Compatibility" rather than "Default" or "Legacy").

Bitcoin receive address example: 38aHXaYihk7VvgGuHcbgDiptXUNFcuxDLK
You can now retrieve the QR code with a screenshot and save the receiving address.
To put this QR code on your works, there are 2 options. One is very simple and accessible to everybody: printing on paper and collage. The second is a little more complicated (cutting stencil) but more durable:
- The easiest way is to print the QR code on paper with the mention "Donate Bitcoin" at the top and your Bitcoin receiving address at the bottom and paste it into your work.

Download this template and add your QR code and receiving address (as shown above). Check that the address shown corresponds to the QR code by scanning it with a smartphone.
Optional: It's recommended to add your website (or social networks) to allow people to be sure that this is your Bitcoin address (and not the address of a person posing as you). Of course, this same Bitcoin receiving address must appear on the front page of your website (and in your social networks profile) to allow donors to verify that the funds will be received by you.
Once the sheet is printed, you can paste it on your next street art piece. If you've never done urban collage, watch this video tutorial. Prefer flat and smooth surfaces for better adhesion of the poster. Just make sure that it fits in with the signature of the work so that fans can understand that the donations are for you.

- The second method is to create a QR code stencil and use spraypaint to put it in your work.
There are 2 possible cutting techniques: A manual technique that requires some basic DIY. The second technique is to prepare the visual on Photoshop and Illustator and then calling a provider who will cut the stencil for you.
1st technique - Manual: To make the stencil yourself, you will need a rigid sheet, a cutting support, a cutting scalpel, masking tape, a black felt pen, a clamp and a thin square grid.
To make the stencil QR code by hand, see this tutorial.


Once the QR code stencil is made, make another stencil with the mention "Donate Bitcoin" and add it to the first stencil to understand that this is your Bitcoin reception address. You can write it yourself or use the template below that you can print and overlay with your rigid sheet.


Once your stencil is ready ("Donate Bitcoin" + QR code), you can put it on your next work with a black spraypaint. Prefer flat, smooth and clear surfaces for a better readability of the QR code. Just must make sure that it fits in with the signature of the work so that fans can understand that the donations are for you.
2nd technique - Stencil cutting by a provider: To create a QR code stencil, it's imperative that the background of the visual is connected to allow cutting of the stencil, for this, it's necessary to go to a site that generates QR compatible stencil code like qrcode-zebra.com

Once on the site, choose the "Text" tab and paste your Bitcoin receipt address and click on "Generate QR code". Your QR code will appear, but the design will not be the right one. There are a few changes to do. In the "Choose patterns" tab on the left, click on the first pattern (which looks like a square grid), then in "Choose eyes", click on the first box (the basic square "eyes"). Then, in "Set colors", choose the color black. Optional: if you wish to add your logo or signature, you can add it in "Add logo". The file should be as simple as possible, in black with transparent background that connects (compatible with a stencil cut).
Now that the QR code is ready, you can retrieve it with a screenshot or click on "Download PNG" and give your email address to receive the QR code as a PNG file.
Then, on Photoshop, it's necessary to couple the grid of your QR code with this template so that the mention "Donate Bitcoin" and the 3 "Eyes" squares of the QR are compatible for a stencil cut. Use overlapping layers and erase old "eyes".

Finally, download this special stencil typography and use it to enter your Bitcoin receipt address used on your QR code. Check that the address shown corresponds to the QR code by scanning it with a smartphone.
It is strongly recommended to also add your website (or social networks) to allow people to validate that this is your Bitcoin address (and not that of a person posing as you). Of course, this same Bitcoin receiving address must appear on the front page of your website (and in your social networks profile) to allow donors to verify that the funds will be received by you.
Once the visual is ready and fully compatible for stencil cutting, you can vectorize it in Illustrator and save it in EPS or AI format.
Last step, send this file to a provider who makes stencil cutting. It's up to you to choose the provider that best suits your location, price and time. Choose a format that suits your job. For large frescoes, larger formats (A2) are preferable, and for smaller works, smaller sizes (A4)

Once you receive the stencil, you can affix it to your next work with a black spraypaint. Prefer flat, smooth and clear surfaces for a better readability of the QR code. Just make sure that it fits in with the signature of the work so that fans can understand that the donations are for you.

3 - Last step, communicate
Let all those who follow your work know that they can now support you financially by sending you Bitcoin donations on your Street Art works. You can use the means you have available, your contacts, your website, your social networks ...
To help beginners, here is an article that explains how to buy Bitcoin.
To track the transactions you receive, you can open your wallet regularly to see your balance. To receive a notification when you receive a donation, you can use the Spot Wallet to track transactions at an address of your choice.
The public can also see your balance with blockchain explorers.Here is the balance of my donation address: 3Pboy9ucGEdQUHNu2rrC6RGq4jouRc4Grb
If you receive a lot of donations, it is a good opportunity to communicate on the amount received.
Good luck and good creation! Pascal Boyart
F.A.Q.
Why use Bitcoin?
The money you receive is 100% in your possession because you are the unique owner of your private key (recovery phrase, or "Seed"), unlike other centralized means of payment (Banks, Paypal, Kickstarter, Patreon. ..), Bitcoin works without a third party. It is decentralized. If you are not familiar with crypto-currencies here is an article that explains how Bitcoin works.
How do I use Bitcoin? With your wallet you will create a private key and a public address. The private key (recovery phrase, or "Seed") is a bit like the key to your digital vault that you have to keep only for yourself. The public address is like your Bank Identity Statement to receive transactions, you can share it publicly without problem.
How do I exchange my bitcoins for dollars, euros... ? You can at any time send your bitcoins to an exchange (Coinbase, Coinhouse, Kraken ...) to convert them into fiat currency (dollars, euros ...). You need to create an account on one of these exchanges, convert your funds into the desired fiat currency and then make a wire transfer to your bank account. A faster solution can be to use a centralized service provider that offers a Bitcoin wallet connected to a credit card to spend your bitcoins directly (Wirex, Coinbase ...).
This article is not sponsored by the wallets and companies mentioned.
Thanks to Brian O'Hagan for helping me to traduct the original french tutorial.
If you have another questions about this tutorial, you can contact me on: pascalboyart@protonmail.com
Commentaires